Last fall I purchased a QRPKits.com DC40A QRP transceiver. At around $40 it is a no brainer purchase for any kit builder attempting to keep in practice. I really wanted to try an Elecraft, but budgets are budgets. I have my main rig now so I finally decided to take the built and tested DC40A board and house it. During testing I soldered a piece of coax straight to the antenna points on the board. The center conductor broke at the board pretty quick. I was motivated to tie that antenna signal to a bulkhead BNC.
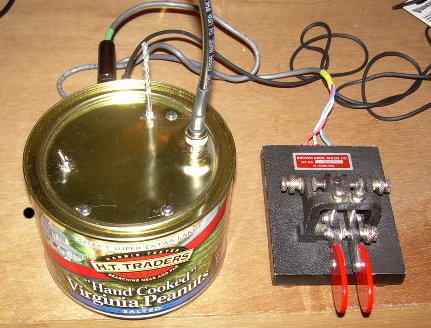
I have several of the peanut cans around so we washed one up, laid out a plan of installation and wound up with this single channel QRP transceiver…

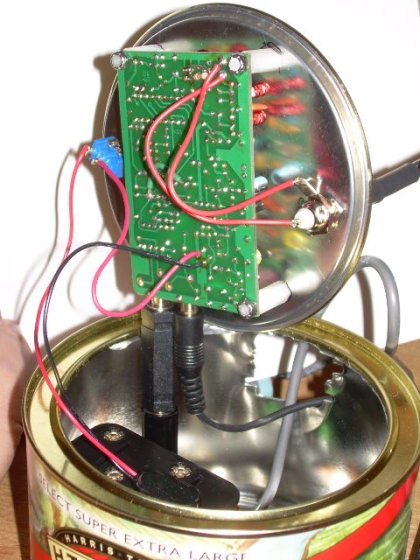
It’s no Altoids Transceiver, but I like it fine. Here is a view of the installation…

Yes I will replace those two wires with a piece of coax.
The only thing I have to finalize is why the transmitter shifts frequency just a little after the initial dot or dash. It is all part of the fun.
Parts include:
- Bulkhead Solder BNC Connector – Digikey
- Eight AA Cell holder – Radio Shack
- Switch SPST – Radio Shack
- Nylon Board Spacers and Hardware – Digikey
- Drill bit to extend the red switch out of the lid – temporary I promise
- Can of Harris Teeter Select Super Extra Large Peanuts
My kid will use this to learn code using a 100 foot piece of wire out his bedroom window and an old Heathkit low power antenna tuner I had laying around.