Answering “The Zed” challenge
Folks in The Zed Zone participating in debate concerning EFHW antennas, have put forth the perfectly reasonable challenge of directly comparing a center-fed and end-fed dipole with no coax. The goal is to see if the end-fed can operate as efficiently as the center-fed… with no wires attached. Here is an example request with response from yours truly…
By “2m experiment already complete” I mean my EIRP measurements of a 2m EFHW HT antenna. Addressing Rege’s request, there exists many choices of small transmitters that fit into Altoid tins and the like. Compared to the long wavelengths of the likely HF test frequencies, these are probably small enough to bolt onto the feedpoint with little concern of “incidental counterpoise” during tests. 80m can happen eventually, but 30m is going to be the first test to keep the two test antennas manageable.
As for showing up to an “antenna measuring party” well that’s going to be replaced with actual field measurements of the E and H fields directly around and along the radiator using laboratory grade sensors, but that’s for another post.
Requirements for a feedline eliminator test transmitter
Let’s review some sensible requirements for this piece of gear…
- Be very small with respect to the antenna dimensions and wavelength under test.
- Have no extraneous conductors: no feedline, no power line, etc.
- Be remotely controllable – with no wires!
- Transmit a 100 mW or so continuous wave signal in the HF band (30m most likely)
- Provide a way to “easily” ID the transmission with my call sign.
- Ensure the thing isn’t a harmonic generating monster.
- Provide enough on board power to run antenna tests.
- Option: Transmit a WSPR signal to benefit from the beacon network.
Help from the local ARC
I asked my local ARC folks their ideas for the smallest, lightest way to put 10-1000 mW at an antenna’s feedpoint completely self-contained. Minutes later, a quick answer from Andy K1RA…
Raspberry Pi Zero W $5 at Microcenter
https://www.microcenter.com/product/486575/raspberry-pi-zero-w
running RPITX (free)
https://github.com/F5OEO/rpitx
can be remotely programmable to generate RF from 0-1000 MHz at ~10 mw
I’ve run that for several days 24×7 as an FM beacon on 435 MHz and it held up fine.
I knew something about the Pi Zero, but hadn’t heard of RPITX. With hope in place, I went shopping.
Amazon
In short order I received two Pi Zero W units along with a spiffy Li-ion Battery HAT that promises to solve the “no power wires” requirement. The built in WiFi of the Pi Zero “W” addresses the remote control requirement. Here is a photo of the Pi Zero W with battery backup atop along with an “as delivered” Pi Zero for comparison and D cell for scale.
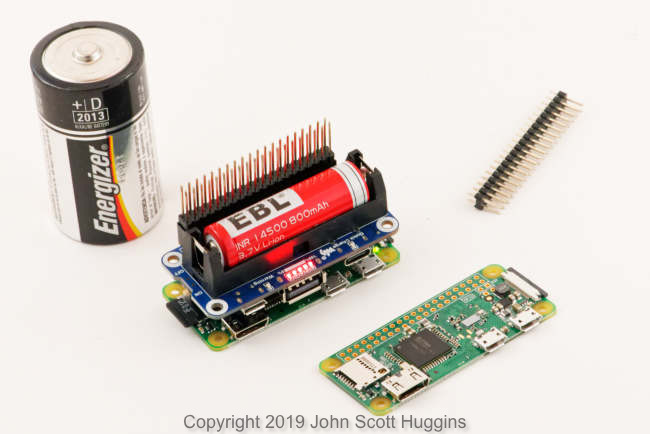
One key feature of the Pi Zero is the assumption the HAT header may not be desirable hence it arrives with the Zero, but not installed. This proved a good first soldering lesson for my 16 yo. If you look close you will notice the lights on the Pi Zero/battery-HAT combo in the middle is actually on, operating, and connected to my home network during this photo shoot. Look ma, no wires! Here is a closer look…

Here is a photo comparing the Pi Zero W with its battery HAT to my music server Raspberry Pi 3 B+ with audio HAT from Audio Injector…
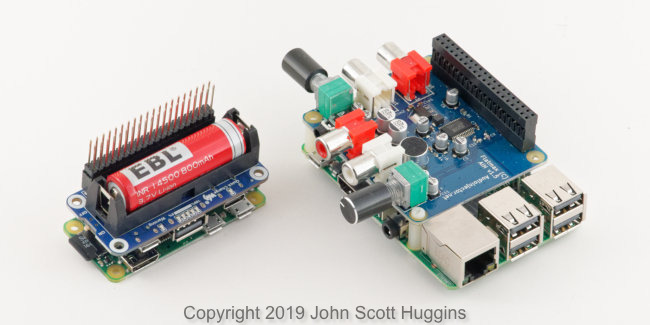
One key difference above, other than size of course, is the audio HAT comes with an elevated 40 pin header socket so the next HAT doesn’t interfere with the rather tall audio components. The battery HAT has no such luxury requiring the addition of a header extender, as seen installed, if you need to stack another HAT above. It was easy enough to purchase the extenders, but would have liked the battery HAT to be as HAT conscience as the audio board vendor clearly is. Oh well.
Not an AA battery

If you decide to mess with this battery power HAT, make sure you always remember that battery is a 3.7 V lithium and not your every day 1.5 V AA cell. They are dimensionally similar. I’m sure it’s not lost on most of you just what might happen if you mistakenly install these lithium cells in the wrong device. Today we live in an age where battery labels matter a great deal…

If you leave these 3.7 volt batteries laying around and someone in your home installs them in your wife’s TV remote, well, God help ya.
Software suite of choice
While operating well within the time frame of one battery charge, I added several programs to the Pi Zero using the traditional “download from Git” approach via the wireless network. The result is three handy programs that all transmit a square-wave RF signal on the DIO4 pin of the Pi header:
- PiCW for transmitting a continuous “tune” signal along with a way to transmit my call sign for identification.
- RPiTX for transmitting a continuous “tune” signal along with numerous modulation examples including FM stereo (This works very well).
- WsprryPi for transmitting a continuous “tune” signal along with an operational, time synced, WSPR transmission.

“temp” is just a script that runs…
/opt/vc/bin/vcgencmd measure_tempTo me the Raspberry Pi products are minimalist beasts just waiting to fail on you so I like to keep an eye on environment variables such as the core temperature. The Pis are particularly sensitive to the supply voltage as well. This makes me wonder how well the 3.7 V to 5 V step up circuitry in the battery HAT works plus how much “switching” noise it generates. Time will tell I guess.
Quick test
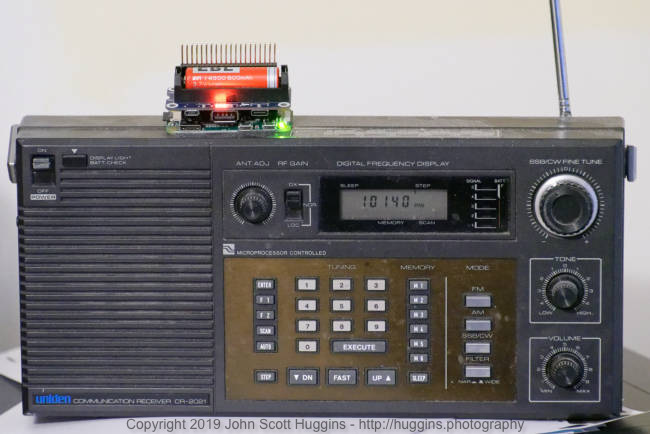
As insanely inefficient a test this is, simply setting the Pi assembly atop my venerable shortwave receiver provides ample ability to listen in.
I fired up the WSPR software on my desktop using the built-in microphone as “receiver” to hear what comes out the speaker of the shortwave along with room noise and such.
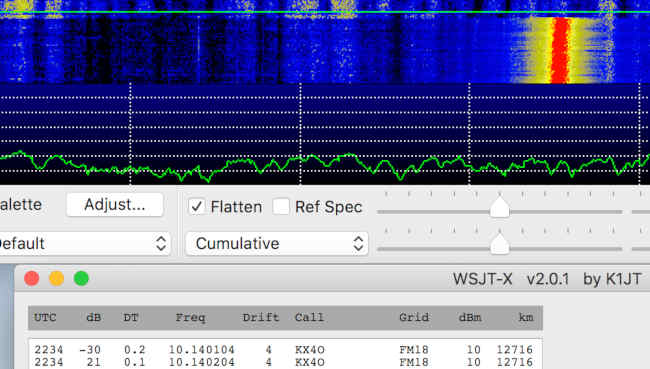
Perfect decode… no problems at all. This data wasn’t sent to the spotting network in case you were wondering.
Potential EMI generator
My shortwave receiver heard the test transmission with no problem at all. It also heard every key stroke I typed into my shell into the R-Pi. In fact whenever that Ethernet passed data, it was obvious on the shortwave. These are likely near-field emissions, but something to keep in mind before connecting this thing to a real antenna.
Harmonics a gaga
The remaining task, and it’s an important one, is a board that filters the square-wave byproduct harmonics from the DIO4 pin leaving only the desired 30m signal. That’s another HAT to add to the stack that also provides amplification of the DIO4 signal to about 100 mW and is on the way from TAPR.
The topic of square waves and odd harmonics is important. You’re well advised to learn about them in this superb presentation of the same principles, but in the audio realm…

Don’t wait for the FCC to personally tutor you about this. You don’t want that… nope.
The TAPR HAT low pass filters the unwanted 3rd and higher harmonics leaving only the root modulated sine wave so that’s good to go. It is also an amplifier drawing power from the Pi, so it will be interesting to see how lithium battery lifetime shrinks due to the extra load.
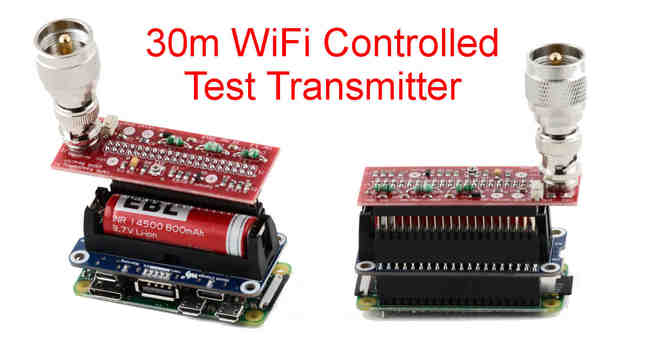
Update: The TAPR HAT arrived and seems to put out 153 mW at 30m. Here is the final assembly.
Conclusion
The endeavor went from nothing to something in about the time to ship the components from Amazon and TAPR. This article documents just how fortunate we are to have such products and tools at the ready for our various tasks.
As the world’s gadgets continue to evolve one realizes it’s a good time for technical aficionados to be alive.